The Cheap LED Strip Upgrade That Makes a Desk Feel Completely Different
There is something oddly satisfying about a desktop setup that feels connected.
The monitor is glowing.
The keyboard lights match.
The room has a little bit of atmosphere instead of looking like a random collection of electronics sitting on a table.
That is why monitor-syncing LED strips became popular. The idea is simple: your lights react to what is happening on your screen.
A bright game scene creates bright colors.
A dark movie scene creates softer lighting.
Everything feels more immersive.
The tricky part is that many people buy budget LED strips expecting them to magically understand their monitor. They usually do not.
You need the right combination of hardware, software, and setup.
First Understand What “Monitor Sync” Actually Means
There are two different things people mean when they say LED strip syncing.
Simple Color Matching
The LED strip changes colors based on software reading your screen.
Your computer analyzes what appears on the display and sends color commands to the LEDs.
True Hardware-Based Ambient Lighting
A dedicated device captures the video signal and controls lighting directly.
This is usually more accurate but often costs more.
Budget setups usually use the first method because it is cheaper and easier.
Check If Your LED Strip Can Connect to Your PC
Not every LED strip is designed for desktop syncing.
Before buying or setting up, check whether your strip supports:
- USB connection.
- Bluetooth control.
- Wi-Fi control.
- Computer software integration.
- Third-party control apps.
A basic remote-controlled LED strip usually cannot sync with your monitor because it has no way to receive real-time screen information.
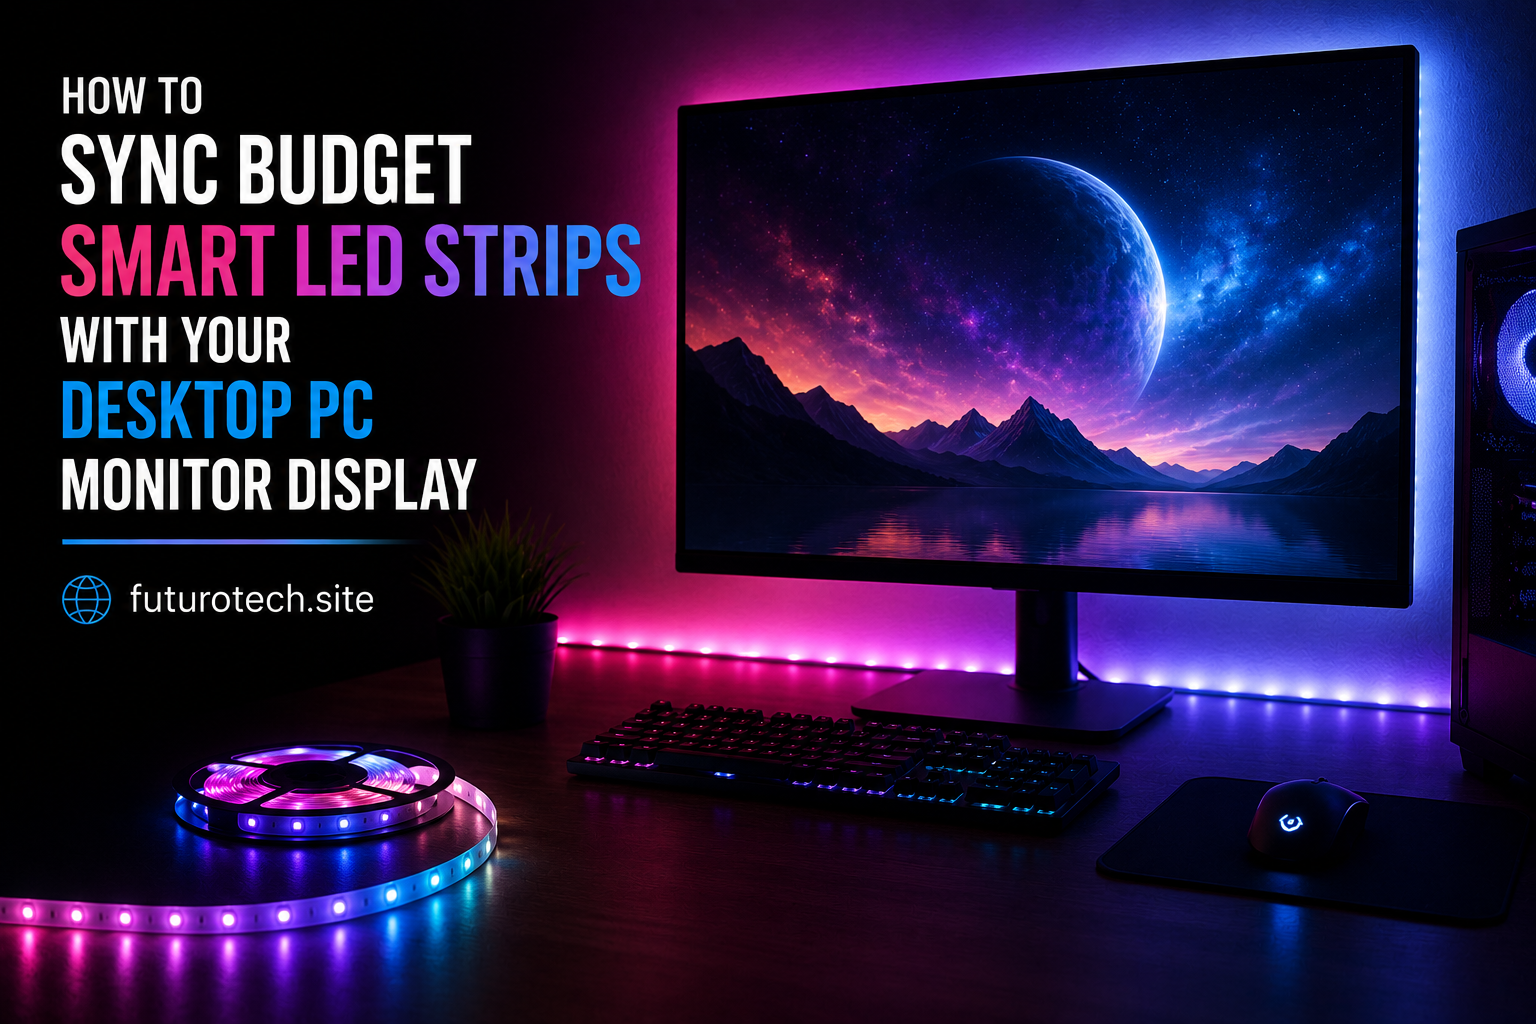
Choose the Right Placement Behind Your Monitor
Placement matters more than people expect.
The best location is usually:
- Around the back edge of the monitor.
- Facing the wall behind your display.
- Evenly spaced around the screen.
The goal is not seeing the LEDs directly.
The goal is creating a soft glow that spreads around the monitor.
Directly visible LEDs often look harsh and distracting.
Install the LED Strip Carefully
Before sticking everything down permanently:
- Clean the back of the monitor.
- Plan the cable route.
- Check the strip length.
- Test the lights first.
The adhesive on cheap LED strips can be unpredictable.
Sometimes it holds forever.
Sometimes it gives up after a few days for no obvious reason.
A little preparation helps.
Connect the LED Strip to Your Computer or Controller
Depending on your setup, connection may happen through:
- USB.
- A smart lighting controller.
- A home automation bridge.
- Wireless pairing.
Follow the strip manufacturer instructions first.
Budget LED products vary a lot, even when they look almost identical.
Install Screen Sync Software
The software is the part that makes the magic happen.
The program watches your screen and calculates the colors that should be sent to the LED strip.
A typical setup looks like:
- Install the LED control software.
- Allow screen access if requested.
- Select your LED controller.
- Enable screen color capture.
- Adjust brightness and speed.
The software is basically translating pixels into lighting.
Adjust the Sync Settings Until It Feels Right
The default settings are rarely perfect.
You may need to adjust:
- Brightness.
- Color intensity.
- Reaction speed.
- Smoothing.
- Screen capture area.
A super-fast reaction might look cool for gaming but annoying during normal desktop use.
A little smoothing usually creates a more natural effect.
Match the LED Layout to Your Monitor Position
This is one of those details people skip.
If your LED strip software allows zones, make sure they match your monitor.
For example:
- Top LEDs match the top of the screen.
- Left LEDs match the left side.
- Right LEDs match the right side.
Otherwise, the colors can feel backwards.
A blue sky appearing on the wrong side of the wall is a little distracting.
Troubleshooting Common LED Sync Problems
The LED Strip Only Shows One Color
Possible causes:
- The wrong lighting mode is selected.
- The controller does not support screen syncing.
- The software is not communicating with the strip.
The Colors Are Delayed
Try:
- Reducing effects.
- Lowering capture quality.
- Using a wired connection if available.
The Strip Disconnects Often
Check:
- Power supply stability.
- USB connection.
- Wireless signal strength.
Do Not Expect Budget LED Strips to Behave Like Expensive Systems
This is where expectations matter.
Premium ambient lighting systems often use dedicated hardware designed specifically for accurate screen matching.
Budget LED strips can still look great, but they may have:
- Slight delays.
- Less accurate colors.
- Fewer customization options.
For many people, the visual improvement is still worth it.
Create Different Lighting Profiles for Different Activities
One setup does not have to do everything.
You might prefer:
- Fast reactive colors for gaming.
- Soft warm lighting for work.
- Low brightness for movies.
Creating profiles makes the setup much more enjoyable.
The Goal Is Not Just More Lights
A good monitor LED setup is not about making your desk look like a nightclub.
It is about creating an environment that feels better to use.
A little background glow reduces the boring darkness behind your screen.
Games feel more immersive.
Movies feel more cinematic.
Your workspace feels more intentional.
And the funny thing is, after a while, you stop noticing the LEDs completely.
You just notice that your desk feels better.